Despite their growing popularity in recent years, location-based apps can still appear overly complicated and maze-like.
Unsurprisingly, many businesses in various industries choose location-based app development to provide a personalized customer experience and increase sales.
As a business owner, you might already know that these apps are called location-based apps and are quickly taking over the digital world. This is not a spy trying to obtain your personal information but an App Development company attempting to make the user experience more personalized and pleasant. In this article, we will discuss the following steps to Build a Location-Based App using Python and AI.
The following statistics say that:
- According to the Research and Markets report, the location-based services market will exceed $73 billion by 2026, registering an astonishing 22% annual growth.
- According to AlliedMarketResearch, the global market for location-based apps will be worth $318.64 billion in 2030.
- Market experts predict a CAGR of 27.1% between 2019 and 2026.
- Statistically, more than 154 million US users use Google Maps regularly, while over 23 million users prefer Apple Maps.
How to Build a Location-Based App: A Step-by-Step Guide:
Step 1: Define your app's purpose and target audience.

This is a perfect time to discover your target audience, what they need and want, and how you can provide these solutions. You should conduct extensive market research to determine whether your product or service suits a specific market niche. Next, determine whether your idea is needed and whether it is worthwhile to develop an app.
Ask yourself the following questions:
- What problem does your app address? Determine the pain points your app will address and the value it will offer users.
- Who is your target audience? Understand your target users' demographics and preferences.
- What are their needs and wants? Determine what features and functionalities your target audience expects from a location-based app.
Step 2: Market Research

You must have a distinct selling point to stand out in a crowded market for mobile location-based applications.
Conduct thorough research to:
- Explore other location-based apps in your niche. Learn about their strengths and weaknesses.
- Analyze the features they offer.Identify market gaps that your app can help fill.
- Define your app's USP. Highlight the distinctive features and benefits that set your app apart.
Step 3: Choose an App Developer

How well your app works depends on the developer or company's skills. Working with the right app development company can help you turn your app idea into a reality.
Choosing an app development company with the necessary skills and a proven track record is critical. Ask the app creator for a list of other location-based apps they've created. Download these apps to see how they work.
Step 4: Choosing the Right Stack of Technologies
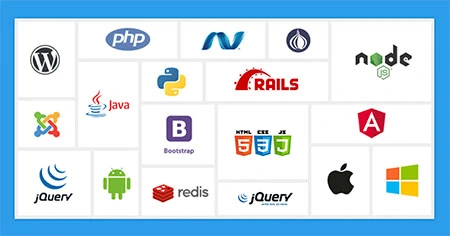
Your app's technology stack is based on its platform (iOS, Android, or Web) and business goals. Integrate the appropriate location-based SDK (Software Development Kit) into your app to obtain the most accurate location data from the user's device. With the Maps SDK for Android and iOS, you can integrate Google Maps data into your app's maps.
Step 5: Select a Location Service Provider:
Choose a reliable location service provider or GPS API that meets your app's needs. Integrate Google Maps into Apple Maps API, Angular, or Mapbox.
Step 6: Decide Features
The features that every geolocation must have are:
- Map view
- Find out where a user is
- A rating and suggestions
- Find places near me
- Notifications based on where you are
- History of a place
- The weather report was stuck on the map.
- Planned routes
- Find a business by looking at photos
- Set the distance
- Updates in real-time on traffic jams
- Sharing where you are with people
Step 7: Design the app's user interface (UI) and user experience (UX).

The success of a location-based app is heavily influenced by its user interface and experience. When designing your app:
- Focus on creating an intuitive, user-friendly interface.
- Implement location-based features that increase convenience and user engagement.
Step 8: GPS Integration

Integrate the GPS API into your application. Create logic to handle location updates, request user permissions, and ensure proper error handling.
Step 9: Data Management
Set up a secure backend server to handle location data, user profiles, and other relevant information. Consider using cloud-based solutions to increase scalability and reliability.
Step 10: Privacy and security:
Follow privacy regulations and ensure that your app collects and uses location data responsibly. Inform users about data collection and usage practices and provide options for controlling location sharing.
Step 11:Optimize for Performance:
Optimize your app's performance and battery efficiency, especially when using GPS. Reduce battery drain and data usage by carefully adjusting location update frequencies and implementing background location tracking.
Step 12: Develop an MVP and tests.

It's time to create a proof-of-concept, or MVP, to test the app and gather user feedback. It should only include core features and be the most basic functional version of your product that you can demonstrate to users and stakeholders. It should show that your business concept is worth investing in and expanding.
Step 13: Deployment and Launch
After collecting user feedback, it's time to refine the MVP and build the final product. At this stage, backend coding occurs, and your idea takes on its final form.
In addition to deployment and launch, you should thoroughly test the app. Ensure there are no bugs or issues and the code is flawless.
Step 14: Gather User Feedback and Iterate:
Encourage users to give feedback and analyze their usage patterns. Use this feedback to keep improving your app and releasing updates with new features and enhancements.


