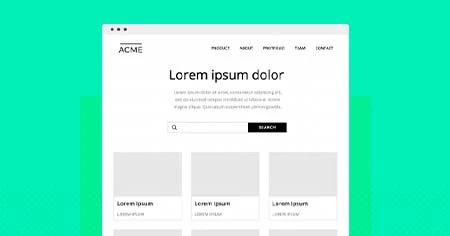
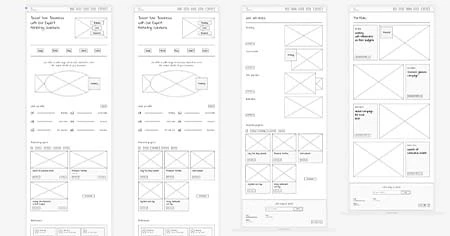
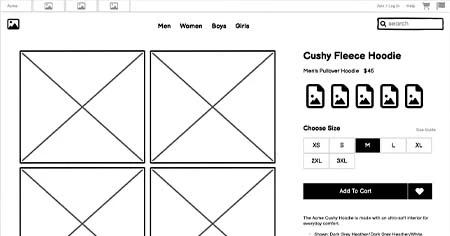
A wireframe for a website or mobile app is similar to a building blueprint in that it provides a clear and basic visual depiction of the structure. User experience (UX) designers utilize wireframes, which are monochrome, two-dimensional renderings, as the first step in website or app design. They use it to build the foundation, engage with business/development teams, iterate on choices, and incorporate input before adding visual design or content. Wireframes for websites and apps save time and make getting started much less intimidating. This article will discuss the step-by-step guide to creating web design in wireframe.
What is a wireframe?

Wireframing is an essential step that serves as the foundation for digital design. Wireframing is a fundamental phase in the user interface or user experience design. Designers primarily use it to outline the features of each screen. Assume you're creating a website for your neighbourhood bakery firm. A wireframe can help you visually arrange features like the banner, search bar, sign-up form, product carousel, demo videos, etc. Depending on how quickly you need it, how comprehensive it needs to be, and so on, you can make wireframes on paper or with a digital tool.
Why do designers create wireframes?

Wireframing is integral to the design process because it forces designers to focus on what users require rather than getting distracted by selecting the proper colors, typography, photos, and other content.
The wireframing step can dramatically reduce product time-to-market and prevent costly design errors. Designers can use it to test and communicate their design concepts to stakeholders without committing to colors, fonts, or copy, resulting in fewer design decisions at the project's outset.
What Makes a Good Wireframe?

A wireframe's primary purpose is to get all stakeholders on the same page to agree on the design. A decent wireframe enables cooperation and iteration. This means that a decent wireframe would not include anything that may distract stakeholders from making judgments about the website's structure. Here's what it will consist of instead:
- A focus on the website/app's functional goal rather than the visual design.
- A simple, straightforward, monochrome representation of the website's characteristics
- Features are consistent across pages and screens.
- Annotations to explain or expound on features.
- Map depicting the user's travel from one page to another
What elements should be included in a website wireframe?

The elements that must be included in a wireframe will differ depending on the type of website or app you're building, the function it will serve, your target audience, and other considerations. In general, almost all wireframes should include some key aspects.
Logo Most websites or apps have a logo or site name, often situated in the page's upper left or top centre. In a wireframe, the logo is frequently only a shape used as a placeholder, with the website or company name in the text.
Layout A wireframe contains a general structure that includes areas for photos, text, navigation, and other features. It serves as a template for developing the finished product.
Navigation Unless you're designing a single page, you'll need to include features that allow people to travel between pages, such as a button or link to return to the home page.
Call-to-Action A CTA, or call-to-action, makes it easier for the user to perform the desired action. For example, you may want the user to subscribe to your email list or purchase something. The CTA is typically a button or text link that may have additional functionality, such as a form.
Several calls to action may exist, but placeholders should be provided for each.
How to create a wireframe?

Creating a web design in wireframe is an organized process that follows a sequence of logical steps. By using this organized approach, designers ensure that each part of the wireframe is carefully designed and contributes to the overall efficacy of the design. This part will walk you through the most popular order for creating wireframes. These stages provide a proven path for creating user-friendly and visually beautiful wireframes.
Step 1: Understand the Project.
Before you start wireframing, you must thoroughly understand the job. This first step lays the groundwork for producing wireframes consistent with the project's goals and resonating with the target audience.
Here's how to elaborate on this critical step.
- Start by establishing the project's primary objectives.
- What is the aim of the website, app, or software interface you are creating?
- Is the purpose to offer information, ease commerce, entertain, or something else entirely?
- Understanding the primary goals will help you make wireframing decisions.
- Investigate the intended users' demographics, preferences, and needs.
- Are you designing for tech-savvy millennials, busy professionals, or a specialized demographic?
- Tailoring your wireframes to the intended audience results in a better user-centered design.
Step 2: List the needed elements
The second step in developing a web design in wireframe is deciding what should appear on the page. You will likely require a logo, navigation menu, photographs, headline, and text or other content. You can always add elements later but try to be as thorough as possible.
Step 3: Do your UX research
A wireframe is a tangible representation of a website or app concept. As a result, before you begin creating, you must first understand who you are building for, what problems it will answer, and why your solution is the best. So, start by completing extensive research on your users and the business. Understand who your consumer is, their needs and wants, their anxieties, what products they currently use, and so on. Designers often create this by using approaches such as user personas or jobs-to-be-done (JTBD).
Understand the business you're building for, the items you sell, the goals you hope to attain, and so on. Your wireframe must-have elements that elegantly connect the two.
Step 4 - Map Out your User Flow
Building on the foundation set in the first phase of project understanding, let's move on to the fourth and most crucial step: sketching your user flows. This step is the compass for your wireframing trip, defining the paths users will take through your digital product.
Step 5: Sketch up the layout and features
Choose the appropriate canvas size based on your design. Then, please bring all the elements you wish to add to the wireframe and arrange them on the canvas. Move them around to get the ideal combination.
Organize the facts you are presenting. Consider the hierarchy of information and decide what should be more prominent. Label buttons, links, and other interactive elements. Include static elements such as the menu, header, footer, etc.
Typically, designers choose the fidelity of their wireframe design at this stage. Initially, a low-fidelity design with minimal details is used. These are usually drawn on paper or hand-sketched onto a gadget. A high-fidelity design features a pixel-specific layout and consistent image/text placeholders. It is frequently created, and a low-fidelity design is accepted. Of course, a grey area of fidelity in the middle is known as medium-fidelity designs.
Step 6: Choose the Right Tool
Wireframing tools can make or break a sale. Having the appropriate tool in your toolbox can change how you turn your ideas into tangible plans.
Step 7: Create a Basic Layout
After gaining a thorough grasp of the project, charting the customer journey, and having the necessary tools, let's move on to the next step: creating a basic layout for your web design in wireframe. Consider this phase the foundation for a masterpiece since it establishes the structure and layout to bring your design to life.
Step 8: Gather Feedback
As your wireframe takes shape, gathering input and fine-tuning your design becomes helpful before moving forward. This step exemplifies the core of collaboration by ensuring that all stakeholders are aligned and concerns are addressed without devoting significant resources to subsequent stages.
Step 9: Review and Iterate
Take your wireframes to the stakeholders: business users and development teams.
You can also conduct guerilla usability testing with potential users. When gathering feedback, use specific questions to collect qualitative and quantitative input. If you have any wireframe options, let users choose which ones they like. Bring key stakeholders together to iterate on low-fidelity wireframes in real-time.
Remember that your primary goal as a user experience designer is to advocate for the user. Business teams are motivated by the company's goals, and development teams evaluate programming options. As a UX designer, you must prioritize the end user's wants and goals.
Conclusion
Wireframing is fundamental for any product design. A low-fidelity wireframe serves as a blueprint for your design. When starting a project, you'll always require a strong blueprint on which to build.


